Travis Brungardt and Joe Cook of Catalyst Construction are building a custom midcentury modern–inspired home for a family of four that will serve occupants for generations to come by prioritizing comfort and efficiency. To achieve this, they are building a durable high-performance assembly that can maintain low energy loads and requires minimal maintenance, while achieving a clean aesthetic and staying within the client’s budget. Not only is this build focused on performance, but the sleek materials and appropriate fixtures both inside and out make it really stand out.
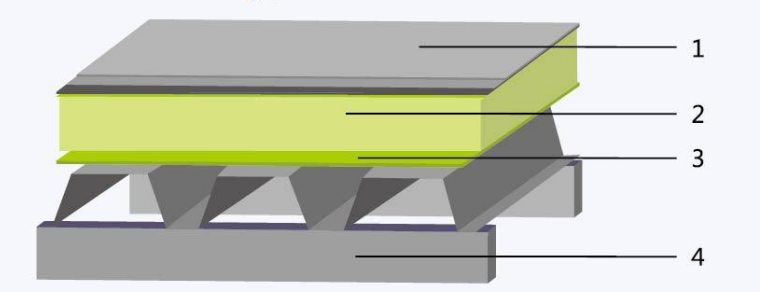
We are using Rockwool stone wool insulation throughout the FHB House. We used Comfortboard under the subslab of the basement walls, and now we’re getting ready to use two sizes of R-23 Rockwool Comfortbatt in the cavities—some for 24 in. on center and some for 16 in. on center. When paired with the ZIP R-6 integrated into our sheathing layer, we’re aiming to achieve R-29 walls. For the roof, we’ll get R-46. Basalt Fiber For Concrete
We like Rockwool because it is vapor open. When building a tight house, you’re not just keeping the outdoor air, pollen, and pollutants from coming in; you’re also keeping in what’s already inside your house. This means that with every shower you take or every pasta meal that you cook, the resulting humidity collects in the house and needs to be managed. A vapor-open insulation is a key detail of our assemblies.
Stone wool insulation (also known as mineral wool) is made of basalt, which is a rock that is super-heated and then spun like cotton candy to make a sort of fibrous matrix. This cuts back on thermal convection and creates a more hostile environment for pests.
Stone wool is also highly fire resistant. If you use concrete siding and this insulation on the exterior of a house in a wildfire area, you’ll have a great assembly.
There are a couple of different ways you can calculate how much insulation you need for a job. We prefer to calculate it off the plans so we don’t have to do it in the field. To do this, we calculate our exterior walls using the elevation to determine our wall height. This helps us form an overall game plan by telling us what our insulation line is throughout the house. (That same boundary is also where we install our air barrier.) You can deduct for windows, but we typically don’t because we’ll use that excess material for fire blocking and stuffing little nooks and crannies throughout the house. You never want to be short on insulation, especially if it’s something you’re ordering. It’s better to have some extra to use on other jobs.
There are a few things you need to do before starting any insulation project, including using the right PPE. You should wear gloves, long pants and a long shirt, safety glasses, and a good dust mask.
Dust from Rockwool products generally settles quickly and doesn’t hang in the air, but you should still wear PPE. There will still be some particulates in the air, especially when you’re sweeping up and cleaning after installation.
Cutting insulation is pretty easy—you just need a tape measure and a saw. Because Rockwool is a stone wool product, we use a specialty knife with a serrated edge. One side of the knife can be used for the Comfortbatt and the other side for the rigid board. You cut the insulation to fit—maybe a quarter-inch bigger than you need it—and then stuff it in the cavity. When there are wires in the bay, simply splice around them.
One of the reasons that we switched to Rockwool as our insulation product of choice was that we can instantly see whether or not the installation was completed properly. There’s not a paper facing stapled over it that conceals all the work and hides whether or not you really did a good job tucking it in around the boxes. With Rockwool, you know immediately if it was tucked in the way you want it.
We aim for full coverage in all of our cavities in order to stop any convective looping, a phenomenon where air rises and falls within the stud bays based on temperature. As air moves, the heat energy is transferred to the outside, resulting in a net loss. This is another advantage of Rockwool—the density of the product doesn’t really allow for any convective looping through the product itself. And if you fill the cavity, there’s no air moving up or down.
You don’t want to cut up a full batt to fill in each individual small space, so you can use your cutoffs. Don’t just pack it in as tight as possible, though. Follow the same practice you would for a wall by piecing it in there. (It’s a relatively stiff product, which makes it easy to piece together.) If you still have excess, you can also use it between floors to decrease sound transfer. There is no reason to put it in the landfill. There are a lot of ways to use it up and make sure that you get the maximum benefit for your client.
We’ve used different insulation products on different parts of this house. We used a lot of the 3-in. (R-12), 4×8 sheets of Comfortboard to insulate under the slab, minimizing heat loss to the earth. Under the steps, to help the transition between planes, we built it up with a 5-in. product for R-20.
We also we ran the 3-in. product right up our foundation walls. When we were getting ready to pour the slab, we had a little bit of this product sticking up just above where the slab was, which gave us a thermal break between the slab and the foundation walls. We then adhered this straight to the concrete walls. We used the Comfortbatt in the cavities, which goes from the top plate down the wall.
Our aboveground thermal bridges on this project are the double bottom plate, which is minimized by the ZIP R-sheathing, and inboard of that there is total continuity of the insulation layer from the slab, which is broken from the foundation, up the wall, and over the top up to the roof. The rim joist and open-web floor truss between the basement and main level is where we used all the cutoffs that would otherwise be considered scrap.
Sign up for eletters today and get the latest how-to from Fine Homebuilding, plus special offers.
Get home building tips, offers, and expert advice in your inbox
Find out your options for applying a seamless drywall patch on a textured ceiling.
Use these tips to keep cables tight and straight for a professional-looking deck-railing job.
"I have learned so much thanks to the searchable articles on the FHB website. I can confidently say that I expect to be a life-long subscriber." - M.K.
Get home building tips, offers, and expert advice in your inbox
Get home building tips, offers, and expert advice in your inbox
© 2024 The Taunton Press, Inc. All rights reserved.
Get home building tips, offers, and expert advice in your inbox
Become a member and get instant access to thousands of videos, how-tos, tool reviews, and design features.
Start your subscription today and save up to 70%
Get complete site access to expert advice, how-to videos, Code Check, and more, plus the print magazine.
Mineral Rock Wool Already a member? Log in